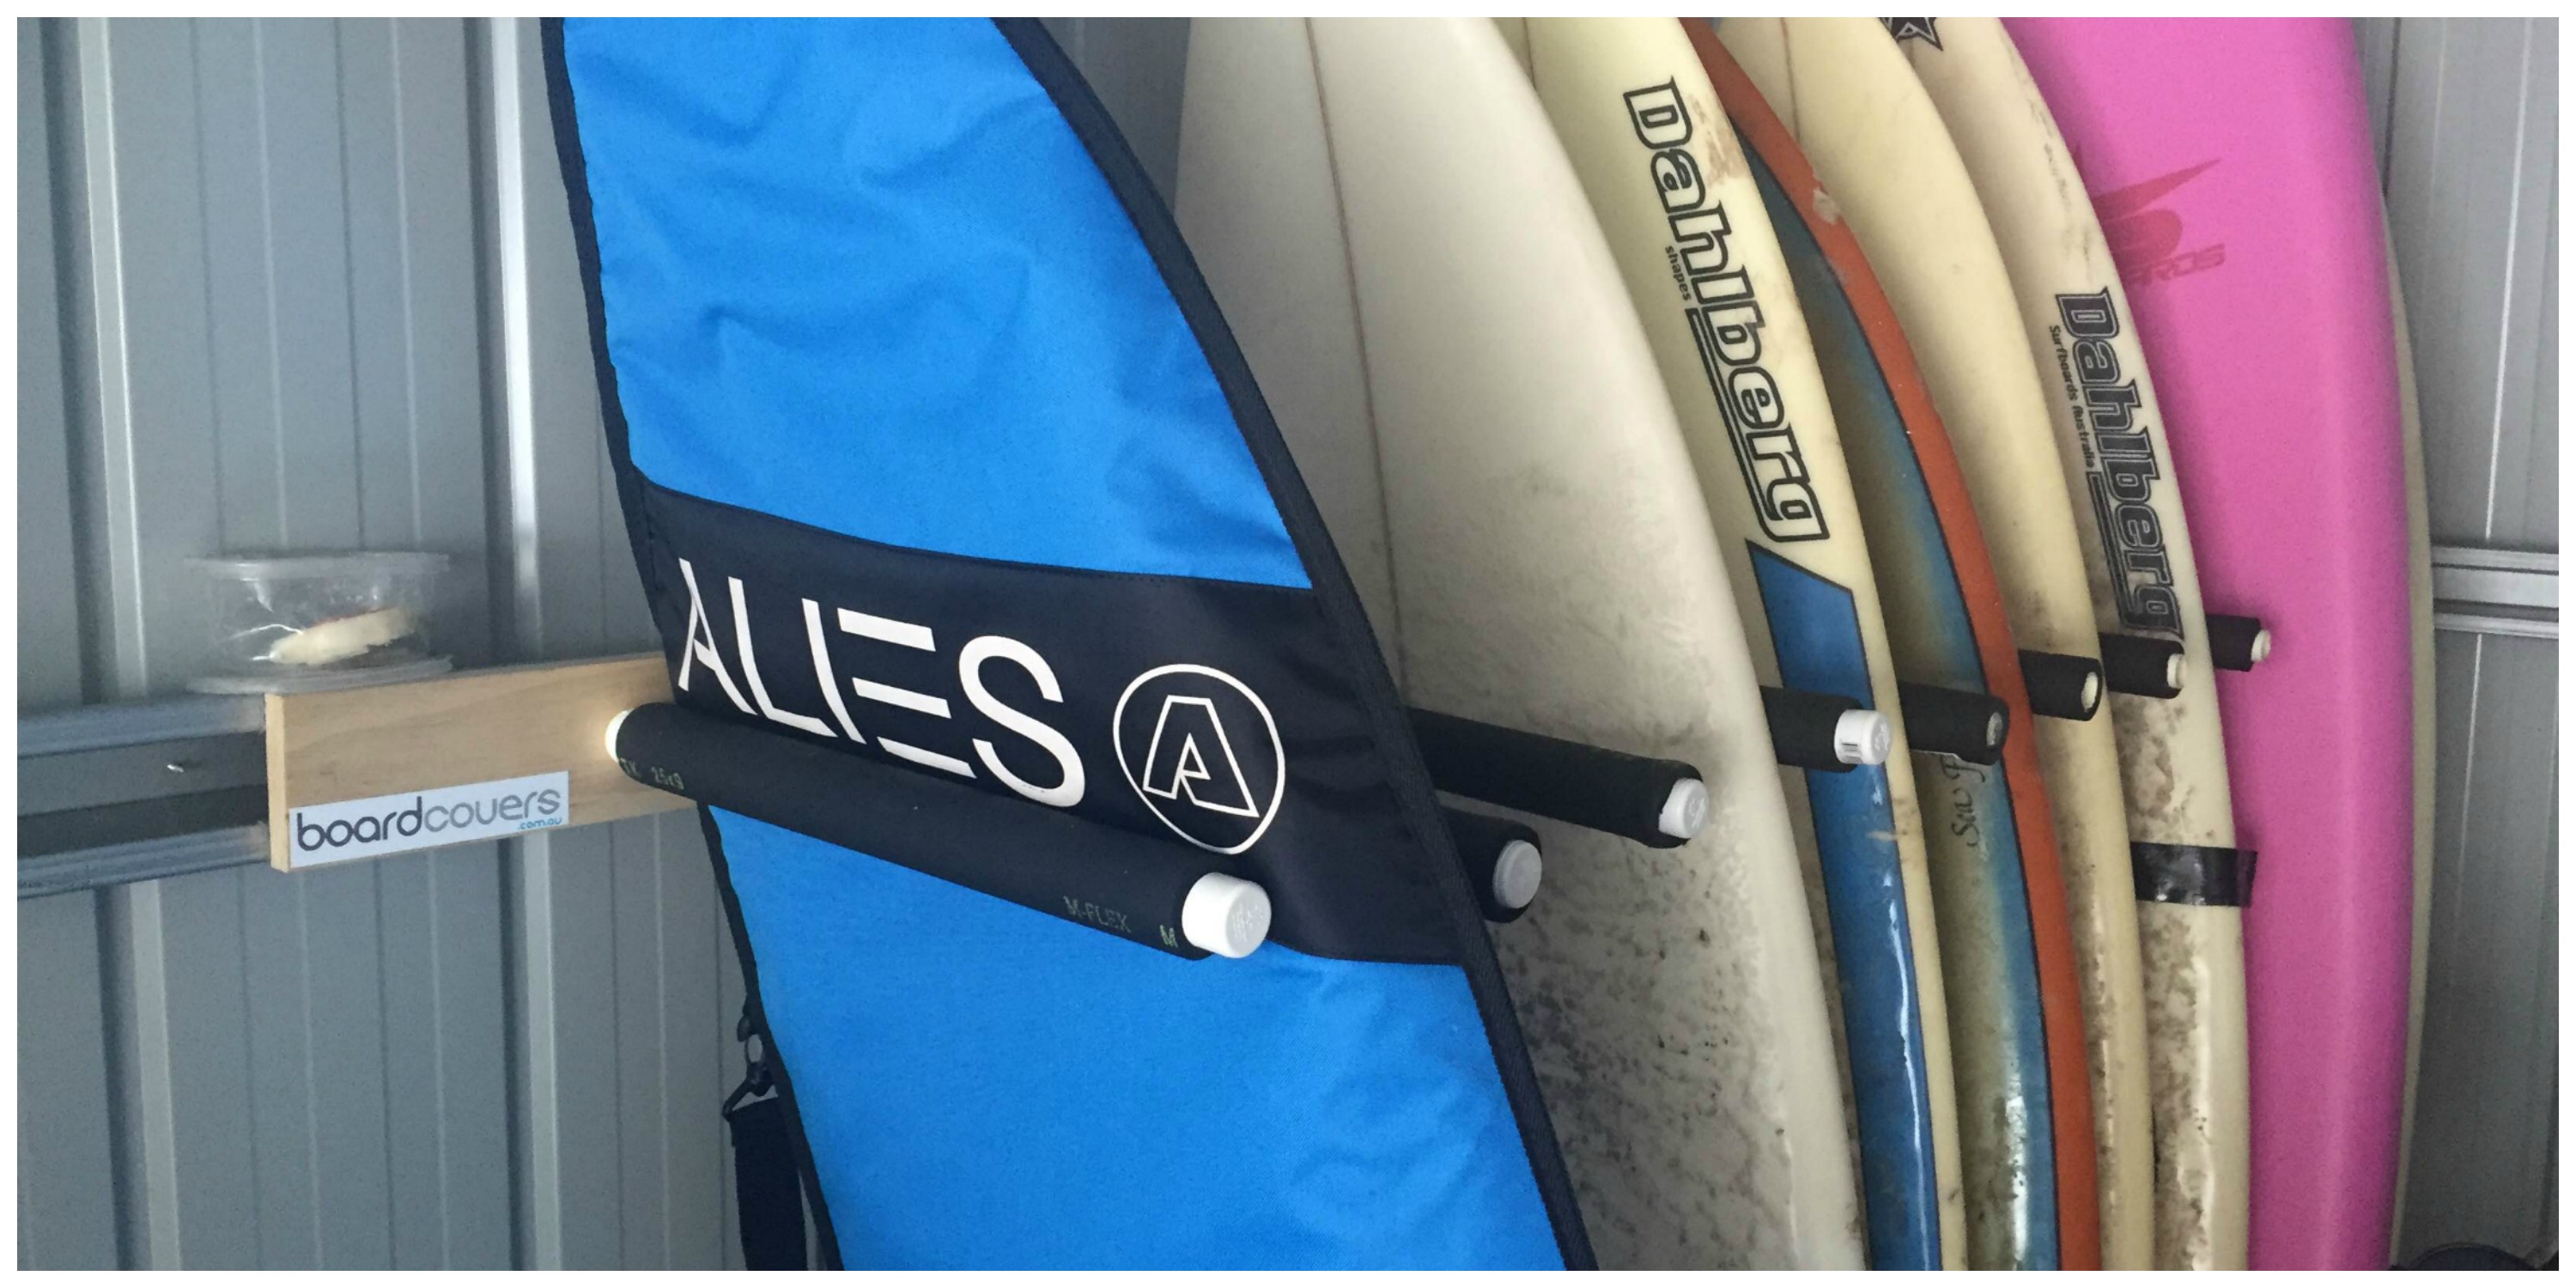
Make Your Own Surfboard Rack
Most damage to boards isn't done down at the beach. It's when you have them sitting in storage. The best way to avoid dings and scratches is to put them in a surfboard cover. The second thing you should do, especially if you have more than one board is to put them in a surfboard rack. Racks can be expensive so we made our own and it cost less then $50.
What you will need:
1 length of timber approximately 185cm long we used pine $5.75
Drill with a drill bit 3/16"
1 packet mushroom head nuts and bolts (18 in the pack) $4.95
2 lengths of PVC plumbing pipe 3m ($4.90 each)
3 lengths of 1m plumbing insulation tube (10.90)
12 Caps ($1.50 each)
Total Cost: $49.40
Step 1
Cut the length of wood to suit the space you have available and how many boards you need to store.
Step 2
Mark out the pipe at 18 inches per length and then cut them to size.
Step 3
Mark out your length of wood as the where the pipes will be placed. We marked them out 18cm apart for our rack.
Step 4
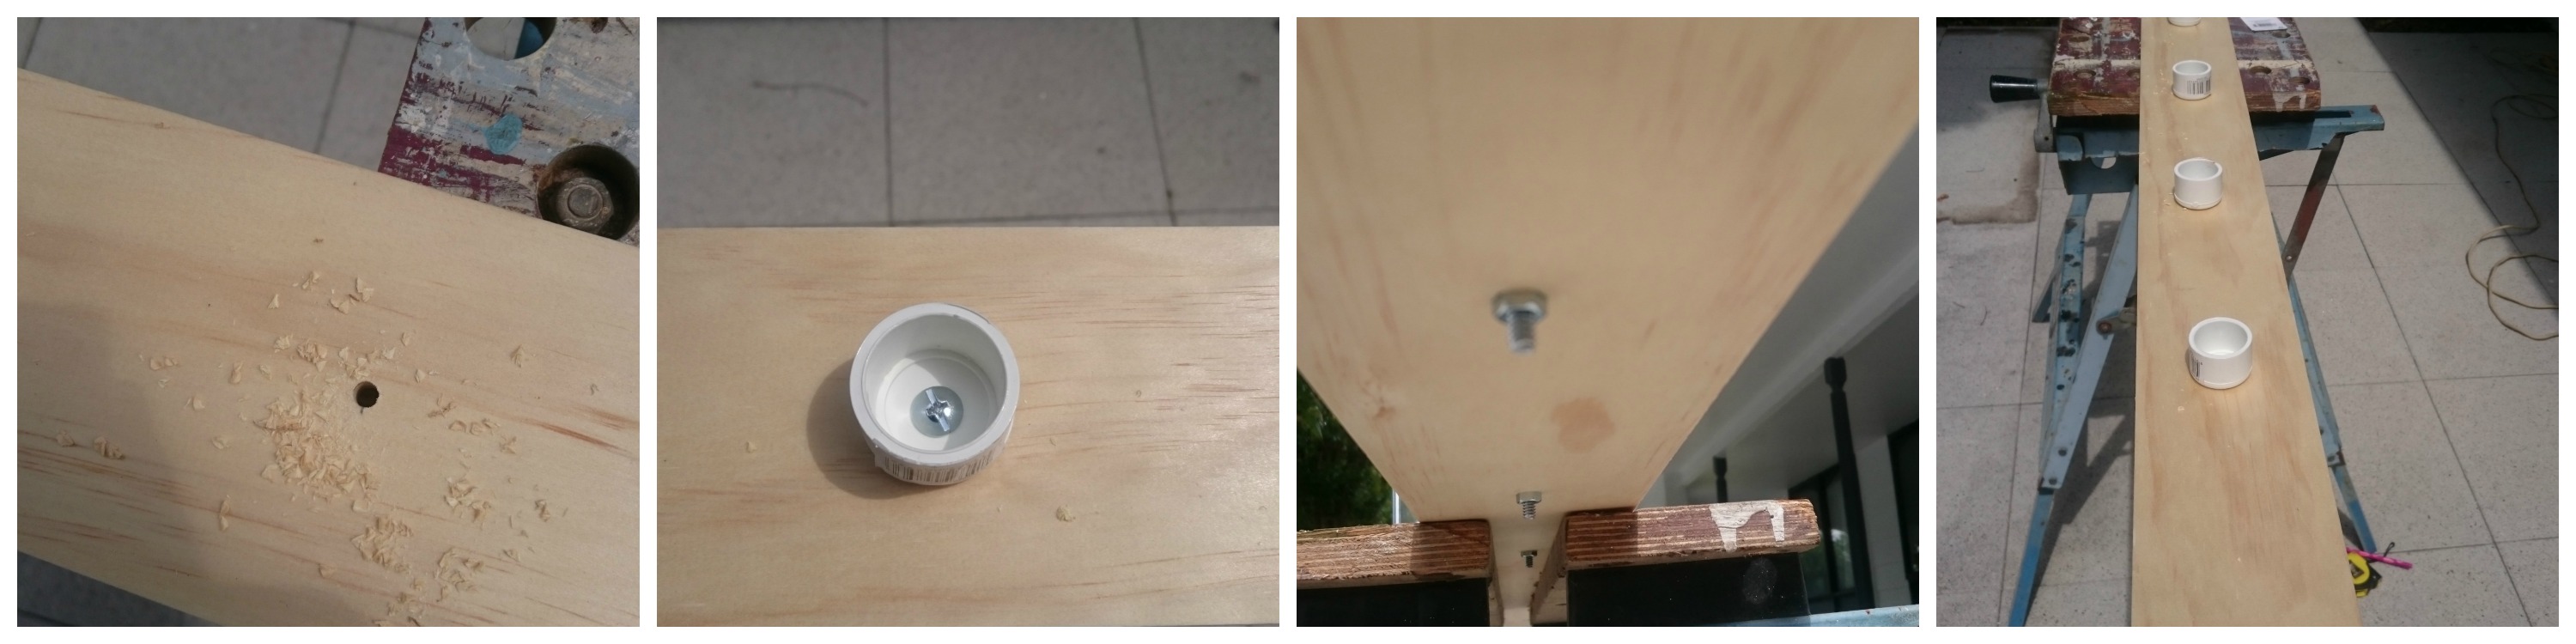
Drill your holes into the wood at the marked out 18cm intervals and centred.
Step 5
Drill the same size hole into the caps
Step 6
Put the bolt through the cap and the wood and tighten it off with the nut.
Step 7
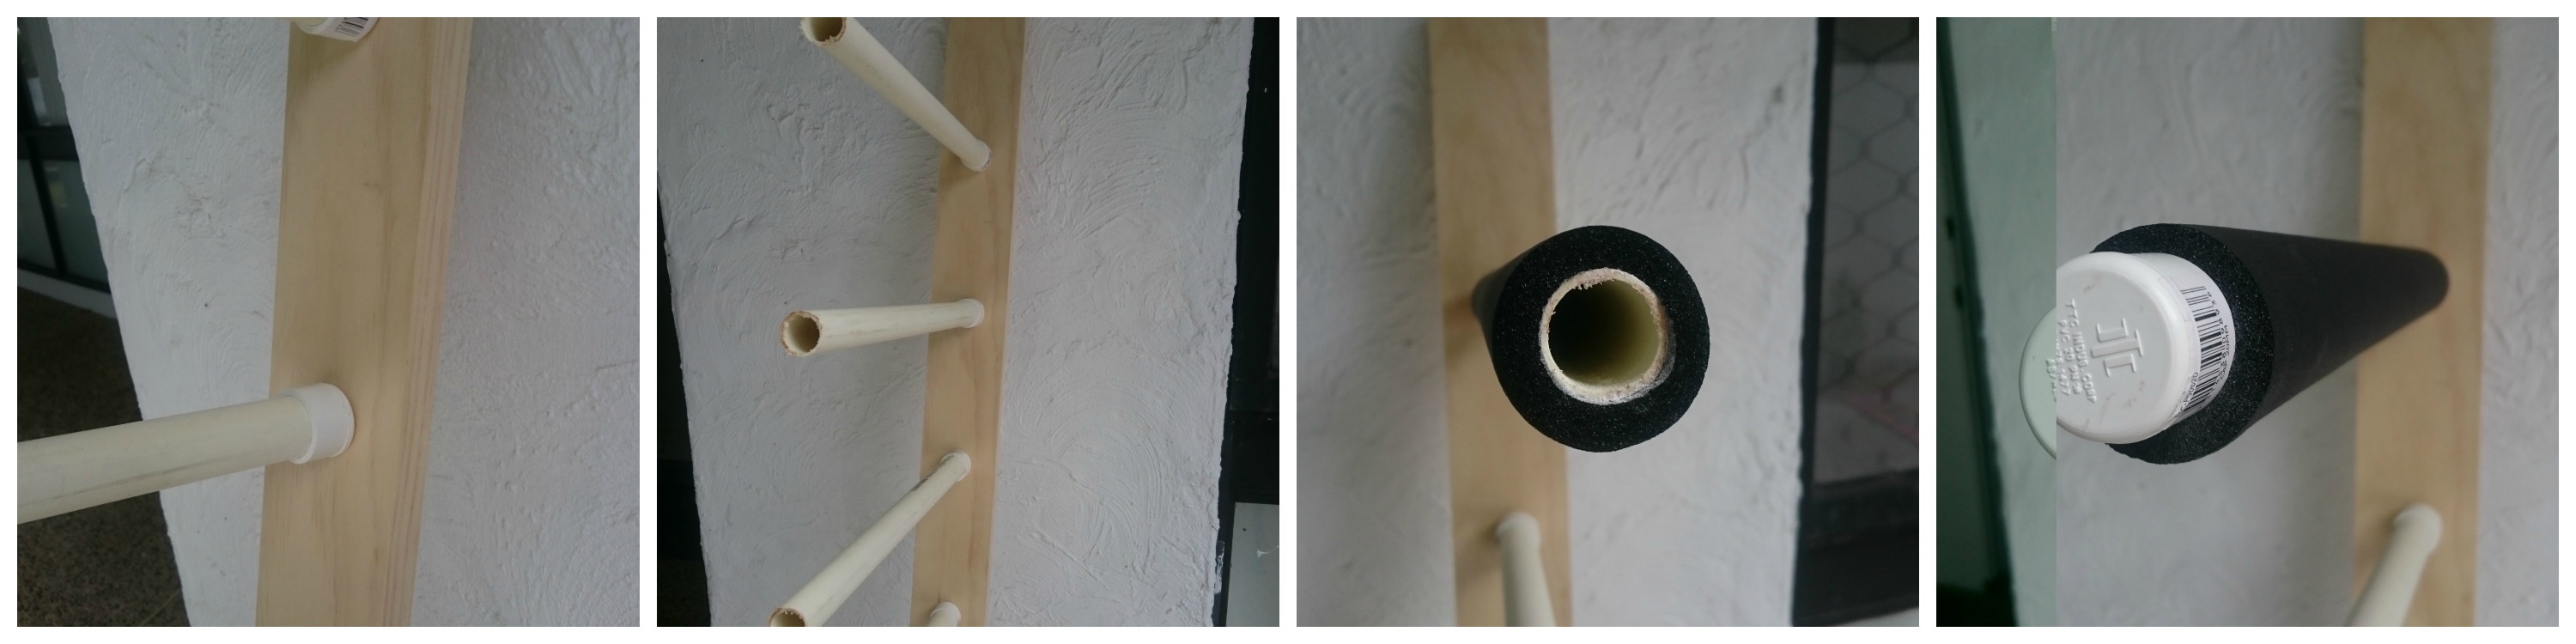
Push your lengths of pipe into the cap.
Step 8
Your plumbing insulation will be sliding over the pipe as padding so cut the insulation to length with a pair of sisscors.
Step 9
Add a cap to the open end of the piping.
Step 10
Fix your rack to the wall. We used heavy duty outdoor 3M tape to fix it to the inside of our shed and we weren't keen on drilling a hole through the wall.